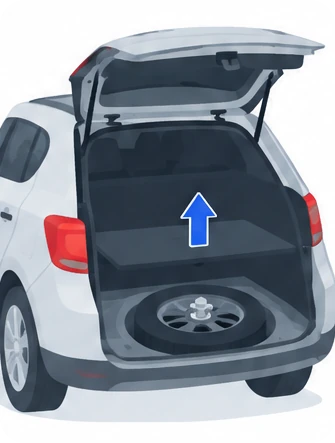
The spare wheel is stored in the boot, under the floor. To reach it, first open the boot floor as described in the Tool kit section. Depending on the version, the spare wheel may be a standard (steel or aluminium) wheel or a space-saver wheel. Ask a PEUGEOT dealer or a qualified workshop for the detailed diagrams.
Removing the spare wheel
- Slacken the nut: slacken the central nut.
- Remove the fastening: take out the fastening device (nut and bolt).
- Lift the wheel: lift the spare wheel towards you from the rear.
- Take it out: lift the wheel out of the boot.
Putting the spare wheel back
The punctured wheel cannot be stored under the boot floor.
- Position the wheel: put the spare wheel back in its housing.
- Loosen the nut: slacken the nut on the bolt by a few turns.
- Fit the fastening: place the fastening device (nut and bolt) in the middle of the wheel.
- Tighten: tighten the central nut enough to hold the wheel correctly.
- Refit the tool box: put the tool box back in the middle of the wheel and clip it in place.
Before removing a wheel
Park where you do not obstruct traffic, on ground that is level, stable and non-slippery. With an automatic gearbox or a drive selector, select mode P to lock the wheels, apply the parking brake unless it is set to automatic mode, and switch off the ignition. Check that the parking brake indicator lamps on the instrument panel are on fixed. Everyone must get out of the car and wait somewhere safe. If necessary, place a chock under the wheel diagonally opposite the one being changed, especially on electric versions. Never go underneath a car raised on the jack: use an axle stand.
If your wheel has a wheel trim, remove it by pulling with both hands on one of its upper arms. When refitting it, line up its aperture with the valve, then push it into place all round its edge with the palm of your hand.
Removing a wheel
- Steel wheels: remove the wheel trim.
- Alloy wheels: remove the central bolt cover using tool 7.
- Security bolt: if fitted, put security bolt socket 2 on wheelbrace 5 and slacken the security bolt.
- Other bolts: slacken the other bolts using wheelbrace 5 only.
- Position the jack: place the foot of jack 6 on the ground directly below the correct jacking point (see below).
- Extend the jack: extend jack 6 using wheelbrace 5 until its head touches jacking point A or B. The contact area on the car must sit properly in the central part of the jack head.
- Raise the car: lift the car until there is enough space between the wheel and the ground to fit the spare (not punctured) wheel easily.
- Remove the bolts: take out the bolts and keep them somewhere clean.
- Remove the wheel: take the wheel off.
Never use an impact wrench on the security bolt socket.
Where to place the jack:
- Petrol, hybrid and rechargeable hybrid versions: directly below the front A or rear B jacking point on the underbody, whichever is closest to the wheel being changed.
- Electric versions, front wheel: directly below the front A jacking point on the underbody. On high range electric versions, it is normal for the jack to push the flexible cover at the front A jacking point as it extends.
- Electric versions, rear wheel: directly below the rear B jacking point on the traction battery mounting rail.
Make sure the jack is stable. On slippery or loose ground, the jack may slip or collapse, with a risk of injury. Always place the jack strictly at jacking point A or B, with its head centred under the contact area. Otherwise you risk damaging the car and the jack collapsing, with a risk of injury.
Fitting a wheel
If you are fitting a steel or space-saver spare wheel to a car with alloy wheels, the bolts hold it differently. On petrol and hybrid versions, washers A do not touch the spare wheel, which is held in place by the conical contact surface B of each bolt. On rechargeable hybrid and electric versions, the wheel is held in place by the spherical contact surface C of each bolt.
- Fit the wheel: place the wheel on the hub.
- Start the bolts: screw in the bolts by hand as far as possible.
- Pre-tighten the security bolt: use wheelbrace 5 fitted with security socket 2.
- Pre-tighten the other bolts: use wheelbrace 5 only.
- Lower the car: lower the car fully.
- Remove the jack: fold jack 6 using wheelbrace 5 and take it away.
- Tighten the security bolt: use wheelbrace 5 fitted with security socket 2.
- Tighten the other bolts: use wheelbrace 5 only.
- Refit the cover: put back the central bolt cover or the wheel trim, depending on equipment.
- Store the tools: put all the tools away.
On high range electric versions, check that the flexible cover at the front A jacking point is back in place once the jack is folded. If it is not, put it back by hand.
After changing a wheel
The punctured wheel cannot be stored in place of the spare wheel, so put it in the boot. If you are using a non-standard or space-saver spare wheel:
- Deactivate certain driving aids, such as Active Safety Brake and Adaptive cruise control.
- Do not exceed the maximum authorised speed of 50 mph (80 km/h) or the maximum distance of 50 miles (80 km).
- Never drive with more than one spare wheel of this type.
- Do not refit the wheel trim from the replaced wheel.
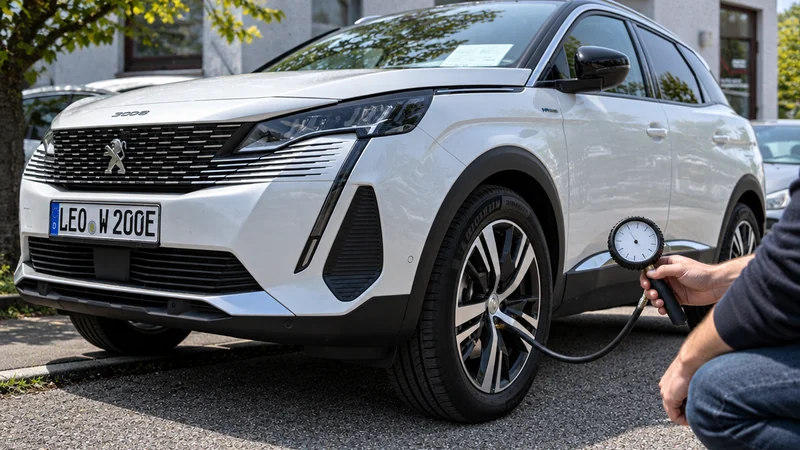
Then go to a PEUGEOT dealer or a qualified workshop to have the spare wheel's bolt tightening and tyre pressure checked, and to have the punctured tyre examined. The technician will tell you whether it can be repaired or must be replaced.
Frequently Asked Questions
Where is the spare wheel or puncture repair kit on the Peugeot 3008?
The tool kit, and the spare wheel if your car has one, is stored in the boot under the floor. Lift the boot floor onto its stops or unfold the articulated boot mat to reach it.
How fast and how far can I drive after using the Peugeot 3008 puncture repair kit?
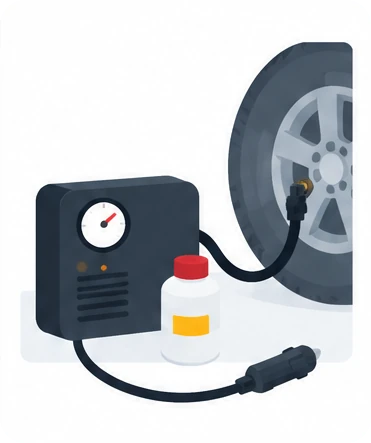
Do not exceed 50 mph (80 km/h) and do not drive more than 125 miles (200 km). Contact a PEUGEOT dealer or a qualified workshop to have the repair checked and the tyre changed.
What is the speed limit on the Peugeot 3008 space-saver spare wheel?
With a non-standard or space-saver spare wheel, do not exceed 50 mph (80 km/h) or drive more than 50 miles (80 km). You should also deactivate certain driving aids, such as Active Safety Brake and Adaptive cruise control.
What if the compressor will not reach 2 bar?
If the pressure of 2 bar is not reached after approximately 7 minutes, the tyre cannot be repaired. Contact a PEUGEOT dealer or a qualified workshop for help.
Whether your 3008 has a repair kit or a spare wheel, knowing where the tools are and how to use them makes a flat tyre much less stressful. Always park somewhere safe first, respect the speed and distance limits afterwards, and have the tyre checked by a PEUGEOT dealer or a qualified workshop as soon as you can.
More Peugeot 3008 Guides
If a warning lamp comes on after a puncture, check our guides to the Peugeot 3008 orange warning lights and Peugeot 3008 red warning lights.
Don't forget to follow us on Instagram for more Peugeot guides!
This is an independent guide, not an official Peugeot publication. If in doubt, contact a PEUGEOT dealer or a qualified workshop before carrying out any work.
Related guides: Peugeot 3008 model guides.
Cover adapted from a photograph by Harvey Bold — Wikimedia Commons, CC BY 4.0 (AI edited).