Peugeot 208Updated 20 min read

Peugeot 208 I Apple CarPlay, Android Auto and Bluetooth

How to use PEUGEOT Connect Nav on the Peugeot 208: voice commands, navigation, CarPlay, Android Auto, radio, USB media and Bluetooth phone pairing.

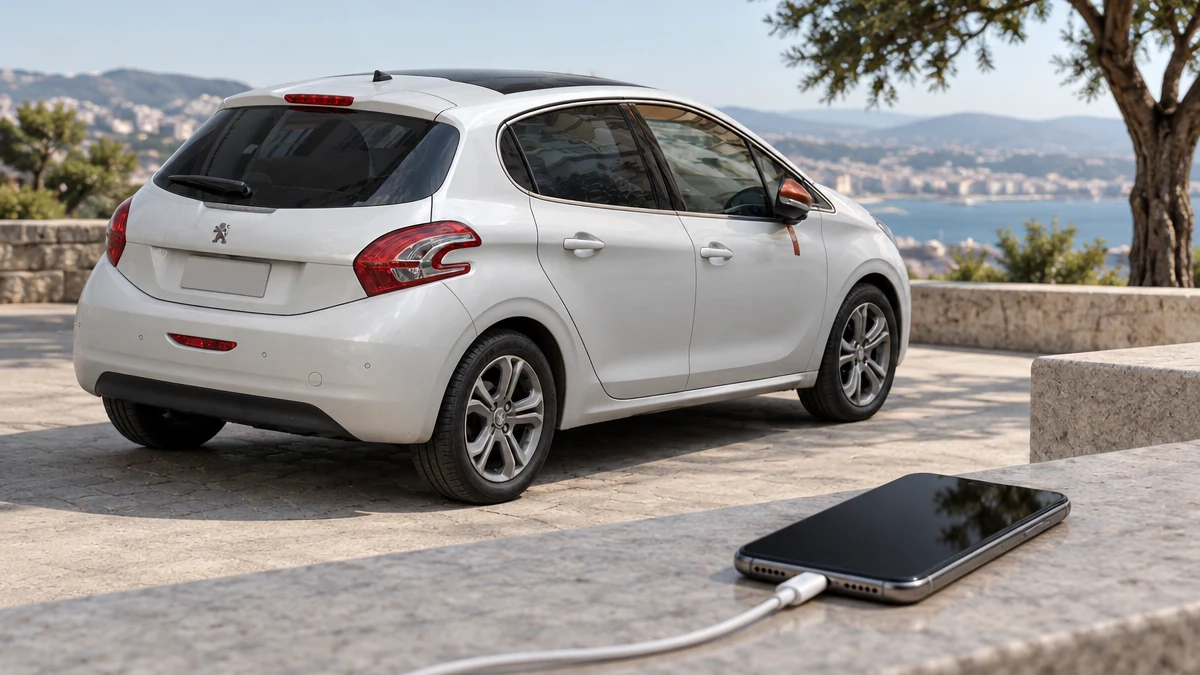
Peugeot 208 I smartphone and USB connection
Image adapted from a photo by RL GNZLZ from Chile, CC BY-SA 2.0.

Hello and welcome. In this post, we’ll look at PEUGEOT Connect Nav, the audio and connectivity system on the Peugeot 208 I. We cover voice commands, navigation, connected navigation, smartphone apps, the radio, media sources and the Bluetooth® telephone.

Quick Reference

USB connection symbol

Scroll the table sideways.

SectionIn short
PEUGEOT Connect NavWhat the system does and the pairing safety rule
Voice commandsGiving voice commands from the steering wheel
NavigationChoosing a destination in several different ways
Connected navigationGetting online, connected services and danger zones
ApplicationsBrowser, CarPlay, MirrorLink, Android Auto and Bluetooth
RadioTuning, presets, RDS, radio text, traffic and DAB
MediaUSB, AUX, CD, Bluetooth streaming and supported files
TelephonePairing, profiles, calls, contacts and messages

PEUGEOT Connect Nav

PEUGEOT Connect Nav brings together GPS satellite navigation, applications, multimedia audio and a Bluetooth® telephone. The functions and settings vary according to the version and configuration of your car.

  • Pairing safety: pair a Bluetooth mobile telephone with the hands-free system only with the car stationary and the ignition on, because it needs your sustained attention.
  • Protection: the system is protected so that it will only operate in your car.

Voice commands

Press the voice command button on the steering mounted controls to activate the voice commands function.

To make sure the system always recognises your commands:

  • Tone: speak in a normal tone, without breaking up words or raising your voice.
  • Beep: always wait for the beep (audible signal) before speaking.
  • Windows: for best operation, it is recommended that you close the windows and sunroof to avoid outside interference (depending on version).
  • Passengers: ask other passengers not to speak before you give a command.
  • Navigation: “Navigate to address, 11 Regent Street, London”.
  • Radio and media: “Play artist, Madonna”.
  • Telephone: “Call David Miller”.

Voice commands are available in 12 languages (English, French, Italian, Spanish, German, Dutch, Portuguese, Polish, Turkish, Russian, Arabic, Brazilian). You give them in the language already set in the system. Some commands have alternative synonyms, for example “Guide to”, “Navigate to” or “Go to”. In Arabic, “Navigate to address” and “Display POI in the city” are not available.

Using the system:

  • Start: press the Push To Talk button and say what you would like after the tone.
  • Interrupt: you can interrupt the system at any time by pressing this button.
  • End: if you press the button while the system is waiting for you to speak, the conversation ends.
  • Start over: say “cancel”.
  • Undo: say “undo”.
  • Help: say “help” at any time for information and tips.
  • Missing details: if the system needs more information, it gives you examples or takes you through it step by step.
  • Dialogue mode: the system’s help message mentions more information in “novice” mode. The global command lets you choose “beginner” or “expert” mode, and you can switch to “expert” once you feel comfortable.

The global, navigation and radio media commands below work from any screen page after you press the “Voice command” or “Telephone” button on the steering wheel, as long as there is no telephone call in progress.

Scroll the table sideways.

Voice commandWhat it does
Help (voice command, navigation, radio, media or telephone help)Gives help on a topic, for example “help with phone” or “help with voice controls”
Set dialogue mode as <...>Choose “beginner” or “expert” mode
Select profile <...>Select profile 1, 2 or 3
Yes / NoSay “yes” if the system got it right, or “no” to start again
Navigate home / Navigate to workStarts guidance to your home or work
Navigate to preferred address / contact / address <...>Starts guidance or adds a stopover, for example “navigate to contact, John Miller”
Show nearby POI <...>Shows points of interest on the map, for example “show nearby petrol station”
Remaining distance / Remaining time / Arrival timeGives information about your current route
Stop route guidanceStops the guidance
Tune to channel <...>Picks a station by name or frequency, for example “tune to 98.5 FM” or “tune to preset number five”
What's playingDisplays the current track, artist and album
Play song / artist / album <...>Selects music, for example “play song, Hey Jude”
  • Addresses: depending on the country, give the address in the language used by the system.
  • Media: media voice commands are available only for a USB connection.
  • Telephone: if a telephone is connected, telephone commands work from any main screen page after you press the “Telephone” button on the steering wheel, with no call in progress. If no telephone is connected by Bluetooth, a voice message says “Please first connect a telephone” and the voice session closes.

You can choose a destination by address, from your history, from contacts, from points of interest or straight from the map.

To a new destination:

  1. Open navigation: press Navigation to display the primary page.
  2. Open the menu: press the “MENU” button to go to the secondary page.
  3. Address: select “Enter address”.
  4. Country: select the “Country”.
  5. Details: enter the “City”, the “Street” and the “Number”, and confirm by pressing the suggestions displayed.
  6. Guidance criteria: press “OK” to select the “Guidance criteria”, and/or select “See on map” to select them.
  7. Start: press “OK” to start navigation.
  • Zoom: zoom in or out using the touch buttons or with two fingers on the screen.
  • Address needed: you must fill in the “City”, the “Street” and the “Number” on the virtual keyboard, or take the address from “Contact” or from the “History” of addresses.
  • Street number: without confirming the street number, you will be guided to one end of the street.

To a recent destination:

  1. Open navigation: press Navigation to display the primary page.
  2. Open the menu: press the “MENU” button.
  3. Destinations: select “My destinations”.
  4. Recent: select the “Recent” tab.
  5. Address: select the address in the list to display the “Guidance criteria”.
  6. Start: press “OK” to start navigation.

Select “Position” to see the arrival point on the map.

To “My home” or “My work”:

  1. Open navigation: press Navigation to display the primary page.
  2. Open the menu: press the “MENU” button.
  3. Destinations: select “My destinations”.
  4. Preferred: select the “Preferred” tab.
  5. Choose: select “My home”, “My work” or a preset favourite destination.

Towards a contact:

  1. Open navigation: press Navigation to display the primary page.
  2. Open the menu: press the “MENU” button.
  3. Destinations: select “My destinations”.
  4. Contact: select the “Contact” tab.
  5. Start: select a contact in the list to start navigation.

Towards points of interest (POI): POIs are listed in different categories.

  1. Open navigation: press Navigation to display the primary page.
  2. Open the menu: press the “MENU” button.
  3. POI: select “Points of interest”.
  4. Category: select the “Travel”, “Leisure”, “Commercial”, “Public” or “Geographic” tab, or select “Search” to enter the name and address of a POI.
  5. Start: press “OK” to start calculating the route.

To a point on the map:

  1. Open navigation: press Navigation to display the primary page.
  2. Explore: slide a finger on the screen to move around the map.
  3. Destination: press on the map to select the destination.
  4. Marker: tap the screen to place a marker and display the sub-menu.
  5. Start or save: press the start button to begin navigation, or the save button to save the address displayed.

A long press on an item opens a list of POIs nearby.

Towards GPS coordinates:

  1. Open navigation: press Navigation to display the primary page.
  2. Explore: slide a finger on the screen to move around the map.
  3. World map: press the world map button, then use the grid to zoom in on the country or region you want.
  4. Coordinates: press the coordinates button to enter the GPS coordinates.

Connected navigation

Connected navigation depends on the version and equipment level of your car. Using a smartphone while driving is prohibited, because it needs your sustained attention, so do all of these operations with the car stationary.

You can connect in two ways:

  • Connection provided by the car: the system connects automatically to the modem included for the “Emergency or assistance call” services. You do not need your smartphone.
  • USB connection: connect a USB cable. The smartphone charges while it is connected.
  • Bluetooth connection: activate Bluetooth on the telephone and make sure it is visible to all (see the Applications section).
  • Wi-Fi connection: select a Wi-Fi network found by the system and connect to it (see the Applications section).

If you use your smartphone as a modem, activate and set up connection sharing on the phone first. There are some restrictions: with CarPlay®, connection sharing works only with Wi-Fi, and with MirrorLink™, only with USB. The quality of the services depends on the quality of the network connection.

With the arrival of “TOMTOM TRAFFIC”, these services are available:

  • Connected Services pack: Weather, Filling stations, Car park, Traffic, POI local search.
  • Danger zone pack: optional.

For the smartphone and the system to work together properly, update the smartphone’s operating system, and the date and time on both the smartphone and the system.

In the “Settings” menu you can create a profile for one person or a group of people, with settings such as radio presets, audio settings, navigation history and contact favourites. These settings are applied automatically.

  1. Open navigation: press Navigation to display the primary page.
  2. Open the menu: press the “MENU” button to go to the secondary page.
  3. Settings: select “Settings”.
  4. Map: select “Map”.
  5. Options: activate or deactivate “Allow declaration of danger zones”, “Guidance to final destination on foot” and “Authorize sending information”. Set these for each profile.
  6. Alerts: select “Alerts”.
  7. Danger zones: activate or deactivate “Warn of danger zones”.
  8. Audible warning: select the button, then activate “Give an audible warning”.

You must select “Authorise sending information” to access connected navigation. The display of danger zones depends on the legislation in force and on your subscription to the service.

To share information when you declare a danger zone, check “Allow declaration of danger zones”. Then press Navigation to display the primary page and press the “Declare a new danger zone” button in the upper bar of the touch screen.

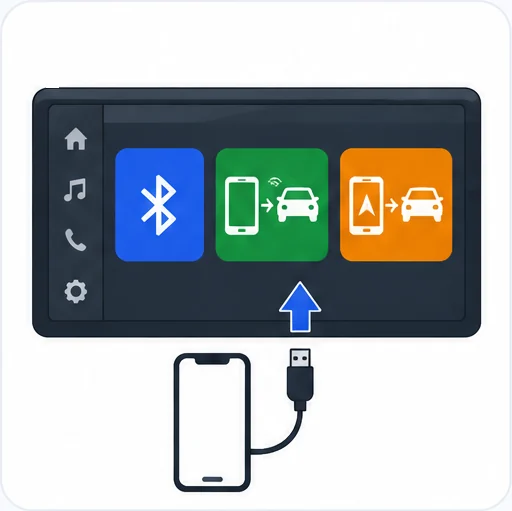
How to connect Apple CarPlay and Android Auto

The Applications page gives you the internet browser, smartphone connections and Bluetooth pairing.

Touchscreen Bluetooth, Apple CarPlay and Android Auto connection icons

Internet Browser:

  1. Applications: press Applications to display the primary page.
  2. Connectivity: press “Connectivity” to go to the “Internet Browser” function.
  3. Browser: press “Internet Browser” to display the browser home page.
  4. Country: select your country of residence.
  5. Save: press “OK” to save and start the browser.

The internet connection uses one of the network connections provided by the car or by you. Press Applications, then “Connectivity” to reach the CarPlay®, MirrorLink™ and Android Auto functions, or “Applications” to display the applications home page.

Using a smartphone while driving is prohibited, because it needs your sustained attention. Do all smartphone operations with the car stationary. For the list of eligible smartphones, see the Brand’s website for your country.

CarPlay®: this displays CarPlay®-compatible apps on the car screen, provided the smartphone’s CarPlay® function has been activated beforehand. Keep the smartphone’s operating system up to date.

  1. Connect: connect a USB cable. The smartphone charges while connected.
  2. Open CarPlay: press “Telephone” to display the CarPlay® interface, or from the system press “Applications”, then “Connectivity”, then “CarPlay”.

When you connect the USB cable, CarPlay® deactivates the system’s Bluetooth® mode.

MirrorLink™: this displays apps adapted for MirrorLink™ on the car screen. It needs a compatible smartphone and apps. The smartphone must be unlocked, and you should update its operating system and the date and time on both the smartphone and the system. It is recommended that you start Bluetooth® on the smartphone.

  1. Connect: connect a USB cable. The smartphone charges while connected.
  2. Applications: press “Applications” to display the primary page.
  3. Connectivity: press “Connectivity” to go to the MirrorLink™ function.
  4. Start: press “MirrorLink™” to start the application. Depending on the smartphone, you may need to activate the MirrorLink™ function.
  5. Accept: accept the screen pages that appear to complete the connection.

A page then shows the apps on your smartphone that are adapted to MirrorLink™. Audio sources stay available in the margin through touch buttons in the upper bar, and the system menus are available at any time through the dedicated buttons. Apps may take a while to become available, depending on your network.

Android Auto: this displays apps adapted for Android Auto on the car screen. It needs a compatible smartphone and apps, and the same conditions apply: the smartphone must be unlocked, with its operating system, date and time updated, along with the system’s date and time.

  1. Connect: connect a USB cable. The smartphone charges while connected.
  2. Applications: press “Applications” to display the primary page.
  3. Connectivity: press “Connectivity” to go to the “Android Auto” function.
  4. Start: press “Android Auto” to start the application.
  5. Accept: accept the screen pages that appear to complete the connection.

Audio sources stay available in the margin and the system menus through the dedicated buttons. In Android Auto mode, the three-finger press that displays the menu is deactivated. With MirrorLink™ and Android Auto, apps can only be viewed with the car stationary, and the display stops once the car moves.

Bluetooth® connection: pair the telephone only with the car stationary and the ignition on. Activate Bluetooth on the telephone and make sure it is “visible to all”.

  1. From the telephone: select the system name in the list of devices detected.
  2. Accept: in the system, accept the connection request from the telephone.

Or from the system:

  1. Applications: press Applications to display the primary page.
  2. Options: press the “OPTIONS” button to go to the secondary page.
  3. Bluetooth: press “Bluetooth connection”.
  4. Search: select “Search” to display the list of telephones detected.

Whichever method you use, make sure the code is the same in the system and on the telephone. If pairing fails, switch Bluetooth off and back on again on your telephone.

Radio

You can tune the radio automatically, manually or by typing in a frequency.

  1. Radio Media: press Radio Media to display the primary page.
  2. Frequency: press “Frequency”.
  3. Search: press one of the buttons for an automatic search, or move the cursor to search manually up or down.

To enter a frequency directly:

  1. Radio Media: press Radio Media to display the primary page.
  2. Options: press the “OPTIONS” button to go to the secondary page.
  3. Stations: select “Radio stations”.
  4. Frequency: press “Frequency”.
  5. Enter: type the units on the virtual keypad, then press the decimals zone to enter the figures after the decimal point.
  6. Confirm: press “OK”.
  • Interference: electrical equipment not approved by the Brand, such as a USB charger in the 12 V socket, can affect reception.
  • Surroundings: hills, buildings, tunnels and basement car parks can block reception, including in RDS mode. This is normal and is not a fault with the audio equipment.

Presetting a station:

  1. Station: select a radio station or frequency.
  2. Presets: press “Presets”.
  3. Save: make a long press on one of the buttons.

RDS and radio text:

  1. Radio Media: press Radio Media to display the primary page.
  2. Options: press the “OPTIONS” button.
  3. Settings: select “Radio settings”, then “General”.
  4. Switch: activate or deactivate “Station follow” for RDS, or “Display radio text”.
  5. Confirm: press “OK”.

With RDS on, the radio retunes automatically to alternative frequencies so you keep the same station. Stations do not cover 100% of the country, so you can still lose a station on a journey. Radio text shows information from the station about the station or the song playing.

Traffic announcements (TA): select “Announcements”, activate or deactivate “Traffic announcement”, then press “OK”. TA gives priority to traffic messages and needs good reception of a station that carries them. The current media pauses during the message and carries on afterwards.

DAB radio: digital radio gives higher quality reception, and the multiplexes list stations in alphabetical order. Press Radio Media, select the audio source, then press “Band” to select the “DAB” waveband.

Media

You can play music from USB, the auxiliary socket, a CD, Bluetooth streaming or an Apple® player.

  • USB: insert the memory stick in the USB port, or connect the device with a suitable cable (not supplied). To protect the system, do not use a USB hub.
  • Playlists: on first connection the system builds playlists in temporary memory, which can take from a few seconds to several minutes. Fewer non-music files and folders mean a shorter wait. The lists update each time you switch off the ignition or connect a memory stick, and loading is quicker next time if nothing has changed.
  • Auxiliary socket (AUX): depending on model and equipment. It works only if “Auxiliary input” is checked in the audio settings. Connect the portable device with an audio cable (not supplied). Set the device volume high first, then adjust the audio system volume. You control playback from the device.
  • CD player: depending on model and equipment. Insert the CD in the player.

Selecting the source:

  1. Radio Media: press Radio Media to display the primary page.
  2. Source: select “Source”.
  3. Choose: choose the source.

Bluetooth® streaming: this plays music from your smartphone. The Bluetooth profile must be activated. Set the phone volume high first, then adjust the audio system volume. If playback does not start on its own, start it from the phone. You can control it from the phone or the system’s touch buttons. Once streaming, the phone counts as a media source.

Apple® players: connect the player to the USB port with a suitable cable (not supplied). Play starts automatically and you control it from the audio system. The classifications are those of the player (artists, albums, genres, playlists, audiobooks, podcasts), with artists as the default. To change it, go back to the first menu level, select the classification you want and confirm. The audio system software may not be compatible with the generation of your Apple® player.

  • Supported devices: USB mass storage devices, BlackBerry® devices and Apple® players via USB. The adapter cable is not supplied. You manage them with the audio system controls.
  • Other devices: if a device is not recognised, connect it to the auxiliary socket with a Jack cable (not supplied) or use Bluetooth streaming, depending on compatibility.
  • File types: “.wma”, “.aac”, “.flac”, “.ogg” and “.mp3”, with a bit rate of between 32 Kbps and 320 Kbps.

How to pair your phone by Bluetooth

Pair your telephone with the car stationary and the ignition on, because it needs your sustained attention. Activate Bluetooth on the telephone and make sure it is “visible to all”.

  1. From the telephone: select the system name in the list of devices detected, then accept the request in the system.
  2. Or from the system: press Telephone to display the primary page, then press “Bluetooth search” or select “Search”.
  3. Choose: select the name of your telephone in the list.
  4. Profiles: select one or more profiles.
  5. Confirm: press “OK”.

Make sure the code is the same in the system and on the telephone. If pairing fails, switch Bluetooth off and on again on the telephone. Depending on the phone, you may be asked whether to transfer your contacts and messages.

The system offers 3 profiles:

  • “Telephone”: hands-free kit, telephone only.
  • “Streaming”: wireless playing of the audio files on the telephone.
  • “Mobile internet data”: required for connected navigation, once you have activated connection sharing on your smartphone.

Automatic reconnection: if the last telephone connected is in the car again, the connection is made within about 30 seconds of switching on the ignition, with Bluetooth activated. To change the profiles:

  1. Telephone: press Telephone to display the primary page.
  2. Options: press the “OPTIONS” button.
  3. Devices: select “Bluetooth connection” to display the paired devices.
  4. Details: press the “details” button.
  5. Profiles: select one or more profiles and press “OK”.

Whether the system can connect to just one profile depends on the phone, and all three may connect by default. Available services depend on the network, the SIM card and the compatibility of the Bluetooth devices, so check your phone’s instructions and your service provider. Compatible profiles are HFP, OPP, PBAP, A2DP, AVRCP, MAP and PAN. For more on compatibility, see the Brand’s website.

Managing and deleting telephones: press Telephone, then “OPTIONS”, then “Bluetooth connection”. Press a telephone’s name to disconnect it and press again to connect it. To delete one, select the basket at the top right, then press the basket next to that telephone.

Receiving a call: a ring and an on-screen display announce the call. Make a short press on the steering mounted PHONE button to accept. Make a long press to reject, or select “End call”.

Making a call: using the telephone while driving is not recommended. Park the car and use the steering mounted controls.

  • New number: press Telephone, enter the number on the digital keypad and press “Call”.
  • Contact: press Telephone or make a long press on the PHONE button, select “Contact”, choose the contact and select “Call”.
  • Recent number: press Telephone or make a long press on the steering mounted button, select “Calls” and choose the contact.

You can always call directly from the telephone, but park the car first.

Contacts: press Telephone, select “Contact”, then “Create”. Add numbers in the “Telephone” tab, addresses in the “Address” tab and email addresses in the “Email” tab. The system cannot send emails.

Messages: press Telephone, then “OPTIONS”, then select “Messages” to display the list.

Frequently Asked Questions

How do I pair my phone with my Peugeot 208?

With the car stationary and the ignition on, make your phone’s Bluetooth visible to all, then select the system name on the phone or press Telephone and “Bluetooth search” on the screen. Make sure the code matches on both.

Why did my 208’s Bluetooth switch off when I plugged in CarPlay?

When you connect the USB cable, CarPlay® deactivates the system’s Bluetooth® mode. This is how the system is designed to work.

No. Apps can only be viewed with the car stationary, and the display stops once the car moves.

What music files will the Peugeot 208 play from USB?

It plays “.wma”, “.aac”, “.flac”, “.ogg” and “.mp3” files with a bit rate of between 32 Kbps and 320 Kbps. To protect the system, do not use a USB hub.

PEUGEOT Connect Nav puts navigation, music and calls at your fingertips on your Peugeot 208. Set things up with the car parked, and check the touchscreen menu or ask a PEUGEOT dealer if a function on your version works differently.

More Peugeot 208 Guides

For what the lamps on your dashboard mean, see our guides to the red warning lights, orange warning lights and green and blue warning lights on the Peugeot 208.

Don't forget to follow us on Instagram for more Peugeot guides!

This is an independent guide, not an official Peugeot publication. If in doubt, contact a PEUGEOT dealer or a qualified workshop before carrying out any work.

Related guides: Peugeot 208 model guides.

Cover adapted from a photograph by RL GNZLZ from Chile — Wikimedia Commons, CC BY-SA 2.0 (AI edited).
Related guides

Guide ·

Peugeot 208 AdBlue Refilling (2015-present)

BlueHDi Diesel engines on the Peugeot 208 use AdBlue to clean up their exhaust gases. This guide explains what the SCR system does, how far you can drive on a tank of AdBlue, how to store and handle the fluid s…

Guide ·

Peugeot 208 12 V Battery and Jump Starting (2015-present)

A flat 12 V battery is one of the most common reasons a car will not start. This guide explains how to reach the battery on your Peugeot 208, how to start the engine using another battery or a booster, how to c…